One of the easiest ways to make your home more comfortable and stylish is to put in a ceiling fan. Fans not only move air around well, which helps cool rooms in the summer, but they also look nice on ceilings. A few simple tools and careful planning can make the process of upgrading an old fan or putting in a new one go smoothly and without worry. You can choose where to put it, what style it will be, and how it will work when you install it yourself, plus you can save money on hiring an expert. Anyone may securely install a ceiling fan and enjoy its benefits if they follow the right steps.
Tools and Materials Needed

Get the necessary tools and supplies ready before you start. Having everything ready stops problems and makes sure the installation is safe. Important tools are:
-
Screwdriver (flat and Phillips head)
-
Electric drill
-
Wire cutters/strippers
-
Ladder or step stool
-
Voltage tester
Materials needed:
-
Ceiling fan kit (motor, blades, light kit if included)
-
Mounting bracket and screws
-
Downrod (if ceiling is taller than 9 feet)
-
Wire nuts and electrical tape
Preparing tools in advance keeps the process efficient and reduces the risk of mistakes.
Safety Precautions
When putting up a ceiling fan, safety should always come first. Start by turning off the main breaker and leaving a notice so that no one else accidently turns the electricity back on while you are working. Make sure the junction box is safe for ceiling fans; it needs to be able to hold more weight and wiring. Don't use a regular light fixture box because it might not be able to hold the fan's weight. Make sure the ceiling joists are strong enough to hold the fans. You and your home are both safe when you use the right tools and follow safety rules. Always check the voltage before touching wires to avoid getting shocked.
Turn Off Power
Turn off the circuit breaker that gives power to the room where you will put the fan. Put a notice or tape on the breaker to let others know that work is going on. Before you touch the wires, use a voltage tester to make sure they are dead. This step keeps you from getting shocked by accident and makes sure the installation goes well. Don't only use the wall switch; always turn off the electricity at the main breaker.
Check the Junction Box and Ceiling Joists
Ceiling fans need a firm base to work. Check the current electrical box to check if it is rated for fans. These boxes are made of metal and can carry heavier things. If the box you have now doesn't work, get one that is made for fan installations. Use a stud finder or tap the ceiling to find the ceiling joists. For stability, attach the fan bracket directly to a joist. Proper attachment keeps the fan from swaying, maintains it balanced, and makes sure it stays safe for a long time.
Preparing the Ceiling

After making sure it's safe, get the ceiling ready for installation. Carefully take down any existing light fixture, and retain the screws and mounting hardware in case you need to use them again. To find the right spot for the fan, measure the area and think about how the air will flow and how the room is set up. Look for things that could get in the way, such beams, vents, or smoke alarms. If you have high ceilings, make sure to include a downrod so the fan can work well. Proper placement keeps you from having to make changes later and makes both performance and appearance better. If you prepare the ceiling carefully, it will be easy to place the fan bracket, put less pressure on your arms, and make the installation go smoothly.
Mounting the Bracket and Downrod
Use the screws that come with the fan kit to attach the mounting bracket to the junction box. If you're using a downrod, put the canopy over it, thread the wires through, and tighten the cotter and clevis pins. The downrod lowers the fan to the best height for airflow, especially on ceilings that are higher than nine feet. Make sure the bracket is level and tightly fastened because it holds up the whole fan. If you skip this stage or remove screws, the machine may wobble, make noise, or not work safely. So take your time and check everything again before continuing on.
Wiring the Ceiling Fan

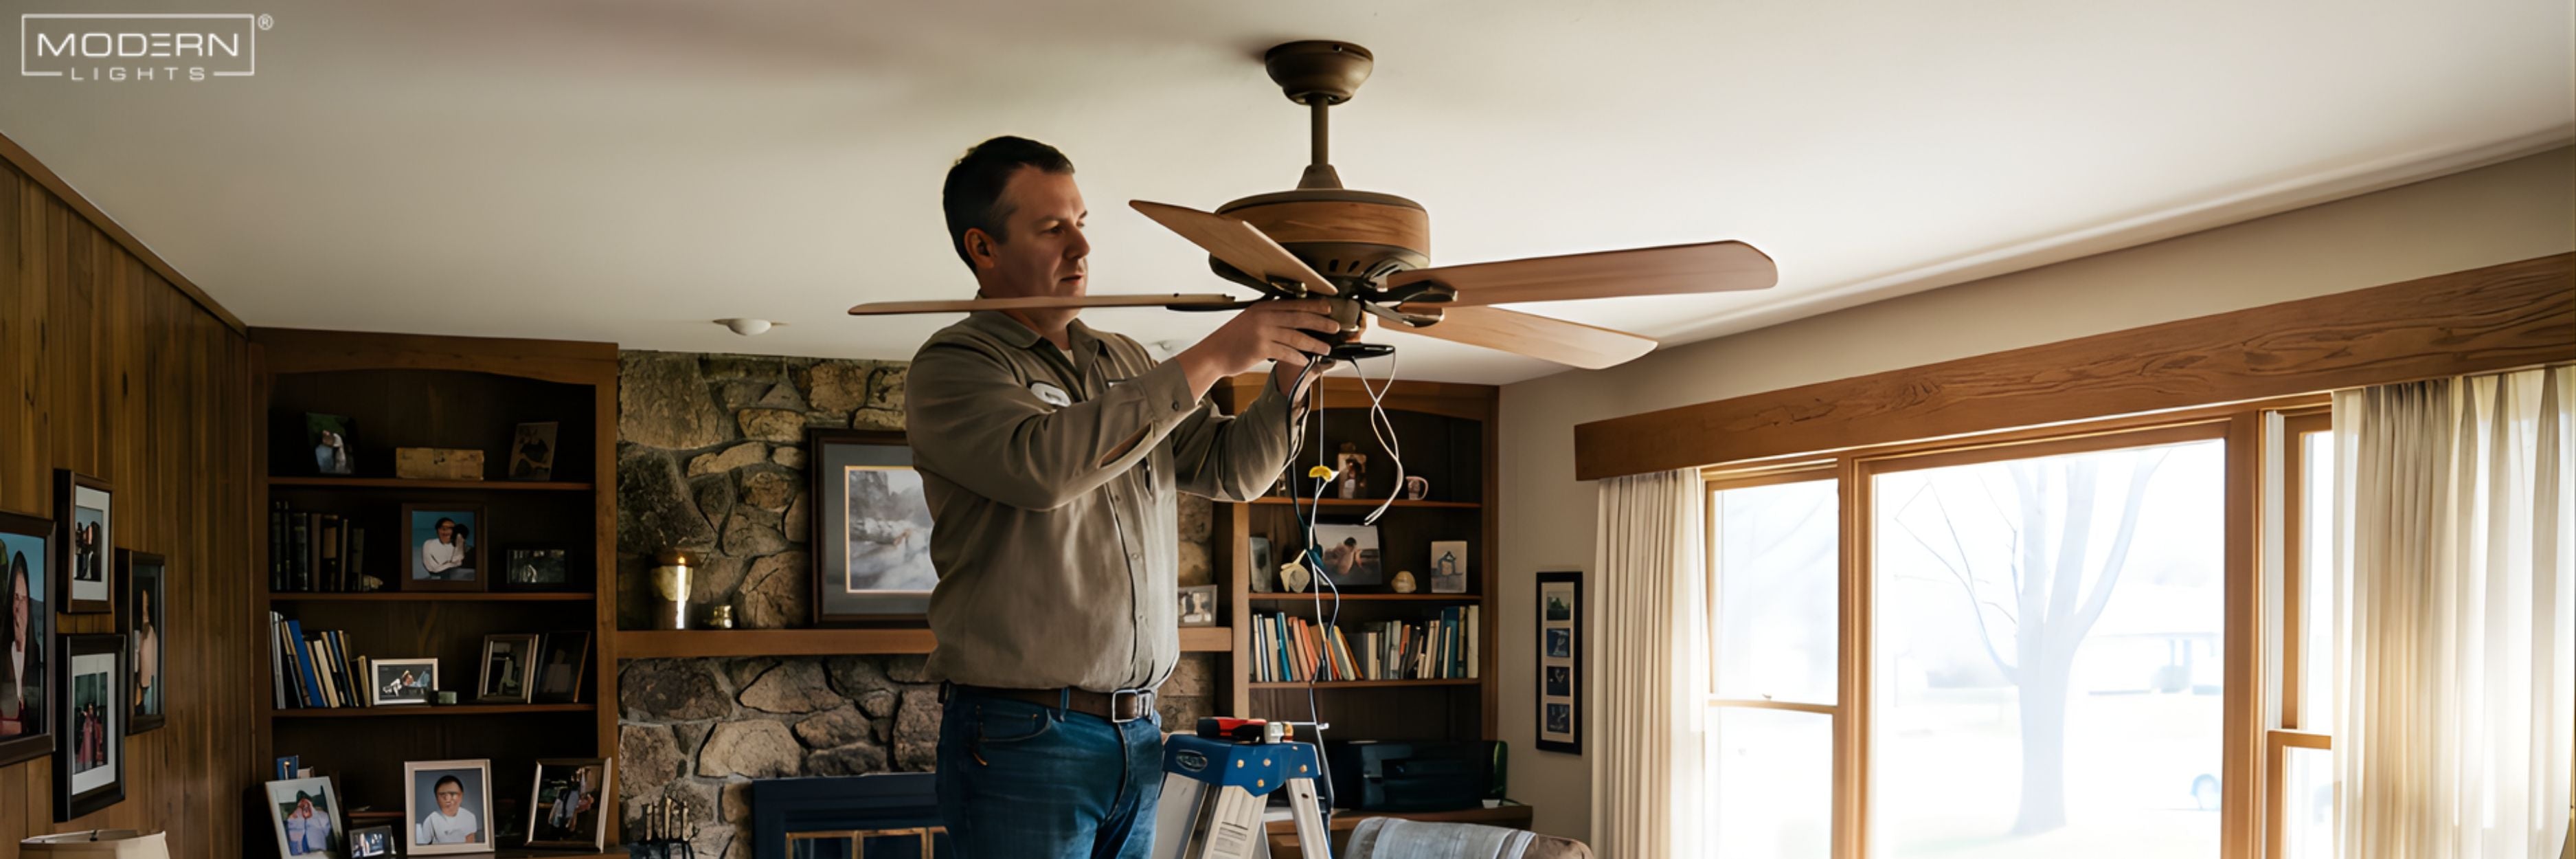
Wiring is an important step that makes sure the fan works well. Be very careful while connecting the wires by color: black to black for the fan power, white to white for the neutral, green or bare copper to the ground, and blue (or striped) for the light kit. Twist the wires together and hold them in place with wire nuts. For extra safety, cover the whole thing with electrical tape. Push the wires into the junction box carefully so they don't get pinched. Before you secure the canopy, make sure all the connections are correct. Proper wiring makes sure that the fan and light kit function well together, keeps electrical risks at bay, and makes sure that everything works as it should.
Connecting Color-Coded Wires
The first step is to connect the ground wire (green or bare copper) to the ground wire in the ceiling. Next, connect the black wires for the fan's power and the white wires for the neutral. If your fan has a light kit, connect the blue or striped wire to the same supply line as the black wire. Twist the wires tightly, put wire nuts on the ends, and fold them neatly into the box. This method lowers the risk of shorts and keeps the installation neat.
Attaching Motor Housing and Blades

Once the wiring is done, attach the motor casing to the bracket. Most fans have keyhole slots or quick-install blade brackets that make it easy to attach the blades. Carefully put the blades in and pull them out until they click into place. Make sure that all of the screws are evenly tightened so that the structure doesn't become unbalanced. EZ mount blades are a characteristic that certain fans have that makes installation faster and easier. Installing the blade correctly makes sure that it rotates smoothly, doesn't wobble, and lasts longer. Take your time with this step because even a small misalignment can impair how well the fan works.
Installing the Light Kit
After you secure the blades, attach the shades and bulbs to the fan if it has lights. Follow the instructions in the handbook to connect the light kit wiring to the fan's blue wire. Make sure the bulbs work with the fan's voltage rating. Before you finish putting the cover on, test the light. Putting the light kit on last makes sure the wiring is easy to get to and keeps the fan blades and motor from getting damaged.
Testing Your Ceiling Fan

Turn the power back on at the breaker and use the wall switch or remote to turn on the fan. Check that the lights work properly at different speeds. Look for tremors, wobbling, or strange noises. To keep everything running well, you may need to make small changes, such tightening screws or leveling blades. Make sure there is enough space between the fan blades and walls or furniture. Regular inspections following installation keep things running smoothly. A ceiling fan that is installed appropriately improves airflow, lowers energy costs, and gives your room steady lighting.
Maintenance Tips
-
Clean blades regularly to prevent dust buildup.
-
Tighten screws periodically to avoid wobble.
-
Replace bulbs and check wiring for any wear.
-
Avoid overloading the fan with incompatible light kits
Installing the Light Kit (if applicable)

This step adds both elegance and utility to your room if your ceiling fan has a light kit. Start by attaching the light shades to the fan's fixture. Make sure they are level and securely attached. Next, carefully connect the light kit wiring to the blue or striped wire on the fan, as shown in your instructions. For safety, twist the wires together and attach them with wire nuts. Then, carefully tuck them inside the motor housing. Put in light bulbs that are the right type and voltage for the fan. Once everything is in place, the light kit makes the fan more useful by adding both light and style without slowing it down.
Testing Your Ceiling Fan
After installing, turning the power back on is very important to make sure it works. If you have a remote, turn the breaker back on and test the fan with both the wall switch and the remote. To make sure the spinning is smooth and doesn't wobble or make too much noise, go through all the speeds. Check the light kit too to make sure the brightness and switch work. Check sure the screws are snug, the blades are balanced, and the bracket is secure if the fan shakes. Testing your ceiling fan properly makes sure it's safe, stops long-term damage, and provides you peace of mind knowing it's working well and keeping your room comfortable.
Tips and Best Practices
Follow these simple techniques to get the most out of your ceiling fan and make it last as long as possible. Cleaning the blades on a regular basis will stop dust from building up, which can make the fan unbalanced and slow down the circulation. you keep everything from wobbling, make sure you tighten the mounting screws and blade brackets every so often. Don't put too many bulbs in the light kit that don't work with it, and think about adding extras like remote controllers or smart fan systems for ease of use. Keep a list of things to do for maintenance so you can fix tiny problems before they get worse. Following these recommended practices will keep your fan quiet, reliable, and efficient, and it will also make any room more comfortable and attractive.
Conclusion
You may save money and add style and usefulness to your home by putting up a ceiling fan yourself. You can enjoy consistent performance and long-lasting comfort by following safety rules, using the right equipment, and carefully completing each process, from putting up the bracket to testing the fan. You can also choose where, how, and what style you want to install it yourself. You can improve your environment by sharing this information with friends, looking at different fan models, or shopping for the perfect ceiling fan. A fan that is installed correctly combines airflow, energy savings, and style, making it a good investment for any home.
Share:
Dining Room Lighting Guide: Chandeliers, Pendants & Ceiling Lights
How to Install a Chandelier? Installation Guide